Education
Understanding ELL: What It Means and Why It Matters in Education
Spray foam insulation is renowned for its ability to dramatically improve a home’s energy efficiency by sealing air leaks and increasing comfort. Many homeowners wonder if they can apply spray foam insulation themselves and whether it’s a worthwhile DIY project. By understanding the benefits, challenges, key steps, safety requirements, and cost comparisons, you can confidently decide if DIY spray foam insulation is suitable for your needs.
Spray foam insulation comes in two main types: open-cell and closed-cell . Both create an air seal that can outperform traditional materials like fiberglass or cellulose, but they differ in cost, rigidity, and R-value (a measure of insulation effectiveness). Closed-cell foam offers the highest R-value and acts as a vapor barrier, while open-cell foam is more flexible and generally less expensive.
The primary benefits of spray foam insulation include:
However, spray foam may not be ideal for every project. Large or inaccessible areas, concerns about chemical exposure, or local building code restrictions may require professional installation. Always check your municipality’s building codes before starting a DIY insulation project.
DIY spray foam insulation is feasible for many small to medium-sized projects, such as sealing gaps in basements, attics, or around windows and doors. Homeowners may save hundreds or even thousands of dollars by taking on the work themselves. For example, one DIYer insulated an attic with spray foam kits and foam board for approximately $2,000, compared to a $5,000+ professional quote [5] . However, professional installers are recommended for large areas, complex structures, or where code compliance and warranty coverage are critical.
When deciding, consider:
Follow these detailed steps for a successful DIY spray foam insulation project:

Preparation is key. Wear gloves, safety goggles, and a respirator to protect against fumes and skin contact. Ventilate the area well and keep all sources of ignition away-the chemicals are flammable [2] . Read all manufacturer instructions thoroughly before beginning application [1] .
Ensure the area to be insulated is clean, dry, and free of dust or debris. Seal larger gaps (over a quarter inch) with caulk or a suitable sealant before applying foam. Cover floors and nearby surfaces with drop cloths or newspaper to catch any overspray.
Common areas for air leaks include:
Inspect these areas carefully and mark places that need sealing. For hidden leaks, consider using an infrared thermometer or smoke pencil to identify drafts.
Spray foam insulation kits are available at major home improvement retailers and online. Kits are typically rated by “board feet” (one square foot at one inch thick). For example, a 200 board foot kit will cover 200 square feet at 1-inch depth, or 100 square feet at 2 inches [3] . Calculate your project’s needs and purchase accordingly. For larger projects, multiple kits may be necessary.
Start by practicing on a scrap piece or waste area to gain control of the foam. Hold the nozzle 6-18 inches from the surface and apply the foam in a steady, continuous bead. Fill gaps no more than halfway, as the foam will expand to fill the remaining space [2] . Mist the area lightly with water before and after application to help the foam cure faster if recommended by the manufacturer.
Apply foam in layers, allowing each to cure before adding more. This ensures better results and avoids overfilling. After curing, trim any excess foam with a serrated knife for a neat finish.
Once the foam is fully cured and trimmed, fill any remaining small gaps with caulk. Dispose of empty spray foam canisters according to local hazardous waste guidelines. Store leftover materials safely, away from heat and children.
DIY spray foam insulation offers significant savings over hiring a contractor, especially for small or medium projects. A typical DIYer spent around $2,000 on kits and foam board to insulate an attic, whereas professional services quoted $5,000 or more for the same job [5] . For smaller tasks (sealing gaps and cracks), a single kit costing under $500 may suffice.
However, professionals have access to high-output equipment and may offer warranties or guarantees on their work. For complex or large-scale jobs, professional services may provide better long-term value despite the higher upfront cost.
Success with DIY insulation depends on preparation, technique, and safety. Keep these expert tips in mind:
DIY spray foam insulation is not without its challenges. Homeowners may encounter:
For those who are uncomfortable with chemicals, have large or complex projects, or need guaranteed results, hiring a professional is a viable alternative.

If spray foam seems daunting or is not suitable for your application, consider these alternatives:
Each insulation type has unique strengths and may be used in combination for best results.
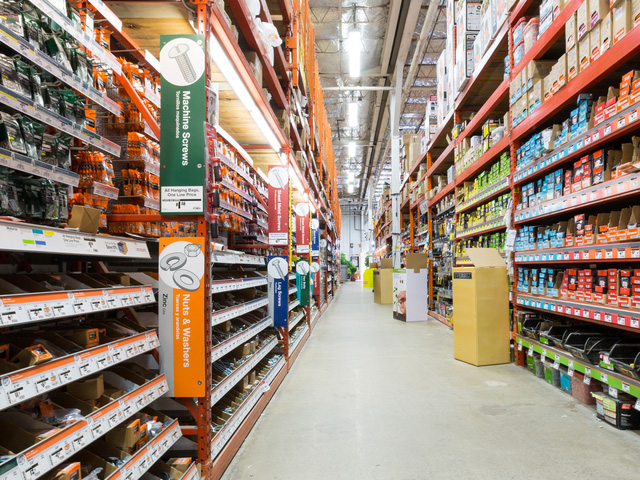
Spray foam insulation kits are available at major home improvement stores such as Lowe’s, The Home Depot, and Menards. You can visit these retailers in person or search their official websites for “spray foam insulation kits” to find options that fit your needs. Always compare products, read reviews, and ensure compatibility with your project.
For specific guidance or finding local professionals, you can contact your local building supply store or search for “insulation contractors near me” using reputable online directories. For building codes and safety requirements, consult your city or county’s official building department website.
DIY spray foam insulation can be a cost-effective way to improve comfort and reduce energy bills when approached with preparation, safety, and the right tools. Carefully assess the scale of your project and your comfort with chemicals before starting. If in doubt, consult a professional or start with a small area to build experience. For further information, consider visiting established home improvement retailers or seeking advice from certified energy auditors.
MORE FROM 9scholarships.de